
Sew Spoiled Mail!

Today I wanted to share an email I received yesterday. It made my whole day, week, year!...
"Hi Leah!

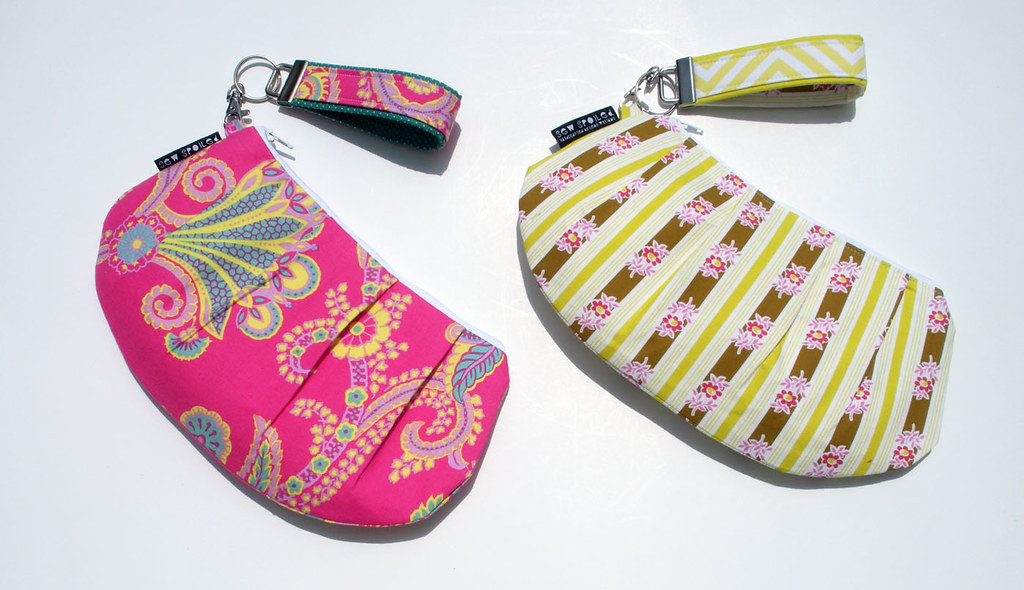
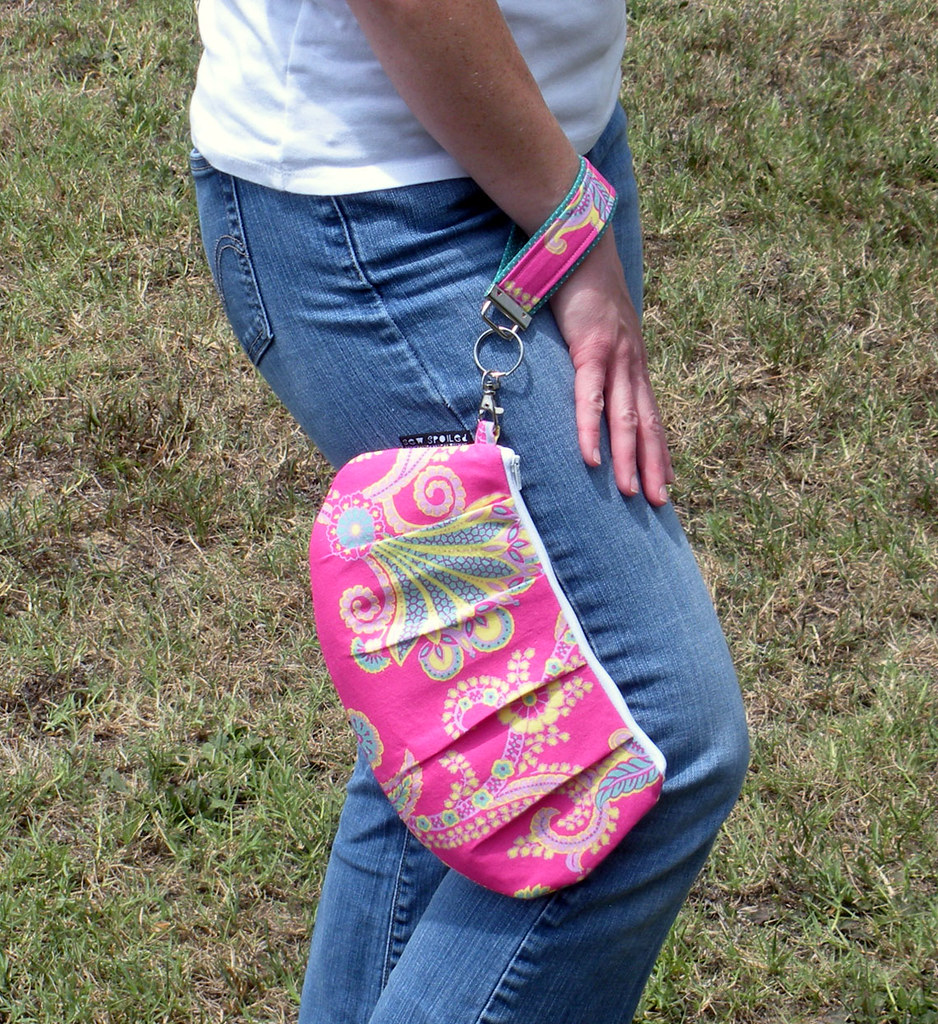
I bought this pattern a few months ago because I'm planning on making purses for my bridesmaids to carry instead of flowers. My mom is helping me out (since she's the one with a sewing machine) and she had a chance to make a prototype last week and it turned out GREAT! My mom is not a professional sewer, but she said the instructions were easy enough to follow and the pictures helped a lot. I can't wait to go pick out the fabric for the official purses and get them sewn. 

Thanks for the great pattern!

Kerri Ann"

Thank you so much Kerri Ann for writing to me. You are right! If you are about to get married the Sew Spoiled Wristlet is an adorable bridesmaids gift! You can personalize it and even match your colors of your wedding! You can also print labels with printable fabric and place your names and date of the wedding inside the wristlets! Here is 5 different ways to make labels!
**If you are a bag maker you might want to offer Sew Spoiled Wristlets as a bridesmaids gift. The Ladybug Mini Purse is another cute bag to offer as a bridesmaids gift. Etsy has a special section for Wedding items! You could offer fabric swatches for them to choose from and make them personalized for their day!
I am so happy for you Kerri Ann and don't forget Pictures! If you have a great way to use a Sew Spoiled Pattern email me at leah.sewspoiled@gmail.com. I would love to share it!
Best Wishes,
~Leah

Comments

Popular posts from this blog

Fun in the Sun Mermaid Tutorial

Sewing Materials: 1/4 yard of Lycra or  5T or larger old swimsuit Thread Stretch Needle (helps) Sewing Machine and Sewing Notions Print the PDF patterns pieces out and tape them together. ✄✄✄✄✄✄✄✄✄✄✄ ✄✄✄✄ ✄✄ Step 1: Cutting Layout-  Place the templates over the fabric and cut. ✄✄✄✄✄✄✄✄✄✄✄ ✄✄✄✄ ✄✄ Step 2:   Fold the top edges of the mermaid tail and sew across. ✄✄✄✄✄✄✄✄✄✄✄ ✄✄✄✄ ✄✄ Step 3: Place the mermaid tale pieces right sides together. Sew around the mermaid tail using the stretch stitch, it looks like a bolt of lighting. ✄✄✄✄✄✄✄✄✄✄✄ ✄✄✄✄ ✄✄ Step 4: Flip the mermaid tail right side out using a chopstick.   Option: You can add Poly-fil to make the end of the tale puffy.   Set aside. ✄✄✄✄✄✄✄✄✄✄✄ ✄✄✄✄ ✄✄ Bodice   Step 1: Cut a bodice measuring  4.5” X1.5” or use template. ✄✄✄✄✄✄✄✄✄✄✄ ✄✄✄✄ ✄✄ Step 2: Fold the bodice right sides together and sew the  short ends making a loop. Use the edge of the presser foot for your seam a

How to Line an A-Line Skirt Tutorial

 After you find an A-line skirt pattern , I am using  One Yard Wonders 101  template . Make a muslin of your skirt! It only takes a few minutes to make a muslin version. Just baste stitch the side seams and make adjustments for your hips. Once your template is right you can make all the skirts your heart desires, so it is important to get the perfect fit first. Now we are ready to cut the "good" fabric and sew! ---------------------------------- ---------------------------------- ---------------------------------- ---------------------------------- Flip the skirt right side out and put it on!! You are done!! It is super easy and your new skirt will look store made.  Plus there is no hand stitching the lining to the main fabric. If you have any questions please comment below or email me at leah.sewspoiled@gmail.com .  WooHooo!! A-Line Skirt Pattern Finds

Sweet Coin Purse Tutorial for Teacher Gifts

This time of year is so special to me because I get to show my gratitude for all of the hard work that goes into teaching my daughters. I love to make handmade gifts and this year is no exception. Since money does not grow on trees around here, I looked at my stash (I keep my scraps in hat boxes ) and tried to see what I had a lot of; small zippers, trims, Peltex strips ( from making iPad cases ), fabric scraps and some hardware for key fobs. So I set to work.  Materials: Plastic multipurpose 5" Zipper  Fabric Scraps Lightweight interfacing 808 Pellon Trims (We clipped  key fobs  with 1.5" swivel hooks onto our coin purses . There are tons of tutorials on making key fobs .) Step 1: Print out the Coin Purse Template  PDF.  Cut 2 main fabric, cut 2 lining and 2 interfacing using the template.  Optional: Cut a 2"X2" square of your choice main fabric or lining. This strip of fabric is used to clip a key fob to your coin purse later. We used a 1.5